In a world where busy days often leave little time for nutritious snacking, homemade no-bake granola bars emerge as the perfect solution-delicious, wholesome, and effortlessly crafted. Thes little bundles of energy not only satisfy your cravings but also bring the comfort of knowing exactly what goes into each bite. Whether you’re a seasoned kitchen creator or a snack-time newbie, these no-bake granola bars are a tasty testament to simplicity and health combined.Join us as we explore easy, creative recipes that you’ll love making and enjoying anytime, anywhere.
Choosing Nutrient-Packed Ingredients for the Ultimate Energy Boost
Wholesome homemade no-bake granola bars you’ll love start with the thoughtful selection of ingredients that fuel your body while satisfying your taste buds.incorporating nutrient-dense elements like rolled oats, raw nuts, seeds, and natural sweeteners such as pure honey or maple syrup ensures every bite delivers sustained energy. Oats provide a slow-release carbohydrate source; nuts like almonds and walnuts supply heart-healthy fats and protein; while seeds such as chia or flax add essential omega-3s and fiber. Adding dried fruits like cranberries or apricots introduces natural sweetness and antioxidants, transforming your granola bars into vibrant, health-packed morsels that power your day from dawn till dusk.
Simple Steps to Crafting Perfectly Chewy No-Bake Granola Bars
The secret to perfectly chewy no-bake granola bars lies in balance and technique. Begin by gently warming your binder-whether it’s a blend of honey and nut butter or light coconut oil-to make it easier to mix and coat the dry ingredients evenly. mix thoroughly to ensure every oat flake and nut cluster is lovingly enveloped in sticky goodness. Press the mixture firmly into your pan, using parchment paper to avoid sticking, and refrigerate for at least two hours until the bars set just right. Don’t rush-patience hear ensures chewiness without crumbling.Remember, the key is to avoid over-pressing which can make bars too dense, or under-pressing that results in crumbly edges.
Flavor Combinations That Transform Your Homemade Treats
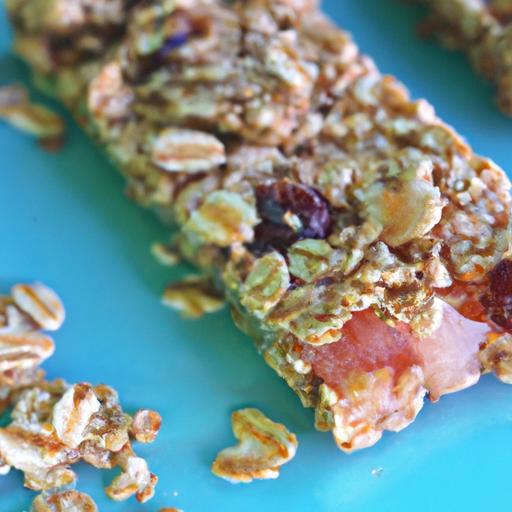
Elevate your bars beyond the basics by experimenting with exciting flavor pairings that create delicious contrasts and layers. Try dark chocolate chips and toasted coconut flakes for a tropical indulgence or combine cinnamon, dried tart cherries, and pumpkin seeds for a warmly spiced snack. For a refreshing twist, add zest of orange and chopped pistachios. Don’t hesitate to mix textures: smooth nut butters, crunchy nuts, chewy dried fruits, and occasional bursts of salted caramel or vanilla extract transform simple treats into moments of pure joy. These thoughtfully crafted combinations make every bar not only wholesome but irresistibly crave-worthy.
Storage Tips to Keep Your Granola Bars Fresh and Delicious
Maintaining freshness is critical for homemade no-bake granola bars. Store them in an airtight container lined with parchment paper to prevent sticking and moisture build-up.For short-term storage, keep bars at room temperature in a cool, dry place, ideally consuming within a week. To extend shelf life, refrigerate; the chilled bars retain their chewiness and develop even better flavor over time. for longer preservation, freeze individually wrapped bars and thaw as needed-this trick is perfect for busy days or on-the-go snacks. Always let frozen bars return to room temperature for 10-15 minutes before digging in for optimal texture and flavor.
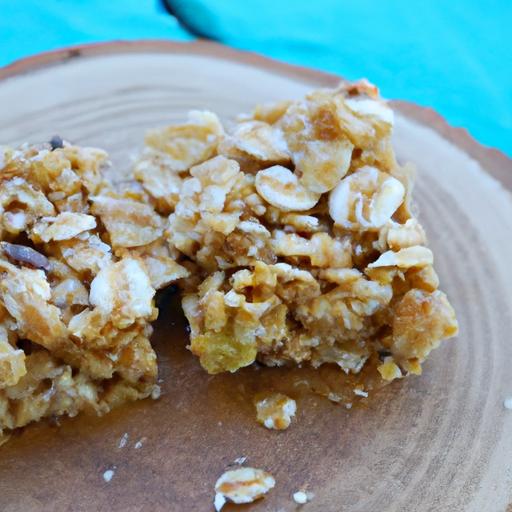
Wholesome Homemade No-Bake Granola Bars You’ll love
Nothing beats the comfort of biting into a wholesome homemade no-bake granola bar you’ll love-a nourishing treat crafted with intention, bursting with texture and flavor without the hassle of an oven. These bars, inspired by the simplicity of traditional trail mixes and contemporary health trends, offer the perfect balance of nutrients, convenience, and indulgence. Whether it’s a post-workout snack or an afternoon pick-me-up, this recipe is designed to bring joy, energy, and vibrant health to your snack time.
Prep and cook Time
- Prep Time: 15 minutes
- Setting Time: 2 hours (refrigeration)
- Total Time: 2 hours 15 minutes
Yield
- Makes 12 bars
Difficulty Level
- Easy
Ingredients
- 2 cups rolled oats
- 1/2 cup raw almonds, roughly chopped
- 1/4 cup pumpkin seeds
- 1/4 cup chia seeds
- 1/3 cup natural almond butter (or peanut butter)
- 1/3 cup pure honey or maple syrup
- 1 tsp vanilla extract
- 1/2 cup dried cranberries, chopped
- 1/4 cup unsweetened shredded coconut, toasted
- 1/4 tsp sea salt
- Optional: 1/4 cup dark chocolate chips
Instructions
- Toast the dry ingredients: In a large pan over medium heat, toast the rolled oats, almonds, pumpkin seeds, and shredded coconut for about 5-7 minutes, stirring frequently until golden and fragrant. Remove from heat and transfer to a large mixing bowl.
- Warm the binder: In a small saucepan, gently warm the almond butter and honey together over low heat until smooth and pourable, about 2 minutes. Stir in vanilla extract and sea salt.
- Combine wet and dry: Pour the warm almond butter mixture over the toasted dry ingredients. Using a wooden spoon or spatula, mix thoroughly until every element is coated evenly.
- Add dried fruit and seeds: Fold in the dried cranberries, chia seeds, and chocolate chips (if using) until well-distributed.
- Press mixture into pan: Line an 8×8-inch baking pan with parchment paper, allowing extra to hang over edges. Transfer the granola mix into the pan and firmly press it down using the back of a spatula or your hands wrapped in parchment.Aim for an even thickness, about 1 inch.
- Chill and set: Refrigerate the pan for at least 2 hours, or until the bars are firm and hold together well.
- Slice and store: Lift the set mixture out of the pan using parchment edges and cut into 12 bars. Store bars in an airtight container in the fridge for up to 1 week or freeze individually wrapped for up to 3 months.
Chef’s Notes
- Substitutions: Swap almond butter for sunflower seed butter to accommodate nut allergies.
- Sweetness adjustment: Increase or reduce honey/maple syrup based on your preferred sweetness.
- Adding crunch: For extra texture, mix in puffed rice or quinoa flakes.
- Make-ahead tip: These bars improve after a day in the fridge as flavors meld beautifully.
- Troubleshooting: If bars crumble, next time press mixture more firmly and ensure proper chilling time.
Serving Suggestions
Serve these granola bars alongside a cup of herbal tea or your favorite smoothie for a wholesome breakfast or snack. Garnish with a sprinkle of toasted coconut or a few fresh berries on the side. Wrapped in parchment paper and tied with twine, they also make perfect homemade gifts. For an energizing boost, warm briefly and drizzle with almond butter before enjoying!
| Nutrient | Per Bar |
|---|---|
| Calories | 190 kcal |
| Protein | 5 g |
| Carbohydrates | 22 g |
| Fat | 9 g |

For more wholesome snack ideas like these no-bake granola bars, check out our Healthy Snack Recipes collection. To learn about the nutritional science behind energy-boosting foods, visit the British Nutrition Foundation.
Q&A
wholesome Homemade No-Bake Granola Bars You’ll Love: Q&A
Q1: What makes no-bake granola bars a great option compared to baked ones?
A1: No-bake granola bars are perfect for those who want a speedy, fuss-free snack without firing up the oven.They retain a chewy, moist texture and preserve the natural flavors of ingredients better than baked versions. plus, they’re ideal for busy days, last-minute cravings, or even kids who want a safe cooking project!
Q2: What are the essential ingredients in a wholesome no-bake granola bar?
A2: The basics include rolled oats, natural nut or seed butter (like almond or sunflower seed butter), a sweetener such as honey or maple syrup, and mix-ins like nuts, seeds, dried fruits, or even a hint of shredded coconut. These components balance taste, texture, and nutrition perfectly.
Q3: Can I customize the bars to suit dietary preferences or restrictions?
A3: Absolutely! No-bake granola bars are wonderfully versatile.Swap nuts for seeds to keep them nut-free, use gluten-free oats if needed, or opt for sugar-free syrups like date syrup for a lower-glycemic option. You can tailor flavors-from citrus zest to cinnamon spice-to match your mood.
Q4: How do I ensure my no-bake granola bars hold together well?
A4: The key is to achieve the right balance between dry and sticky ingredients. Using just enough nut butter and sweetener ensures the mixture binds without being gooey. Press the bars firmly into the pan and chill them well in the fridge or freezer so they set up nicely.
Q5: How long do homemade no-bake granola bars stay fresh?
A5: When stored in an airtight container, these bars typically last about a week at room temperature. For longer storage, keep them refrigerated for up to two weeks, or freeze them for up to three months-perfect for prepping snacks ahead of time.Q6: Can kids safely make no-bake granola bars?
A6: yes! These bars are a fantastic kitchen project for kids since there’s no heat involved. They can mix, press the mixture into the dish, and even customize with their favorite add-ins. It’s a fun, educational way to encourage healthy snacking habits.
Q7: What’s a creative twist to make these bars even more exciting?
A7: Try adding a swirl of natural nut butter on top before chilling, tossing in freeze-dried berries for a pop of tartness, or sprinkling dark chocolate chips once the bars have set for an extra bit of indulgence. Even a dash of sea salt can elevate the flavor to new heights!
Q8: Are no-bake granola bars a nutritious snack?
A8: Definitely! They combine wholesome carbohydrates, healthy fats, fiber, and protein, which helps maintain energy and satisfaction between meals. Choosing quality ingredients keeps sugar low and boosts nutrient content, making them a smart everyday treat.
Q9: How do no-bake granola bars compare environmentally to store-bought options?
A9: Homemade bars often have a smaller environmental footprint because you control ingredient sourcing and packaging waste. Using bulk ingredients and reusable containers reduces plastic use, and customizing bars means you can avoid unneeded preservatives and additives.
Q10: What’s the best way to serve these bars?
A10: Serve them chilled or at room temperature as a quick breakfast on the go, an energizing post-workout snack, or a wholesome accompaniment to your afternoon tea or coffee. They’re portable, mess-free, and satisfyingly delicious-perfect anytime, anywhere!
In Retrospect
wholesome homemade no-bake granola bars are more than just a convenient snack-they’re a delicious canvas for your creativity and a nourishing boost for any time of day. With simple ingredients and zero oven time, you can whip up batches that suit your taste and lifestyle, from nutty and chewy to sweet and fruity. Whether you’re fueling a morning adventure, staving off afternoon slumps, or packing lunchboxes with love, these bars bring wholesome goodness straight to your hands. So go ahead-mix,press,chill,and enjoy the satisfying crunch of a homemade treat crafted by you. Your body, taste buds, and busy schedule will all thank you.